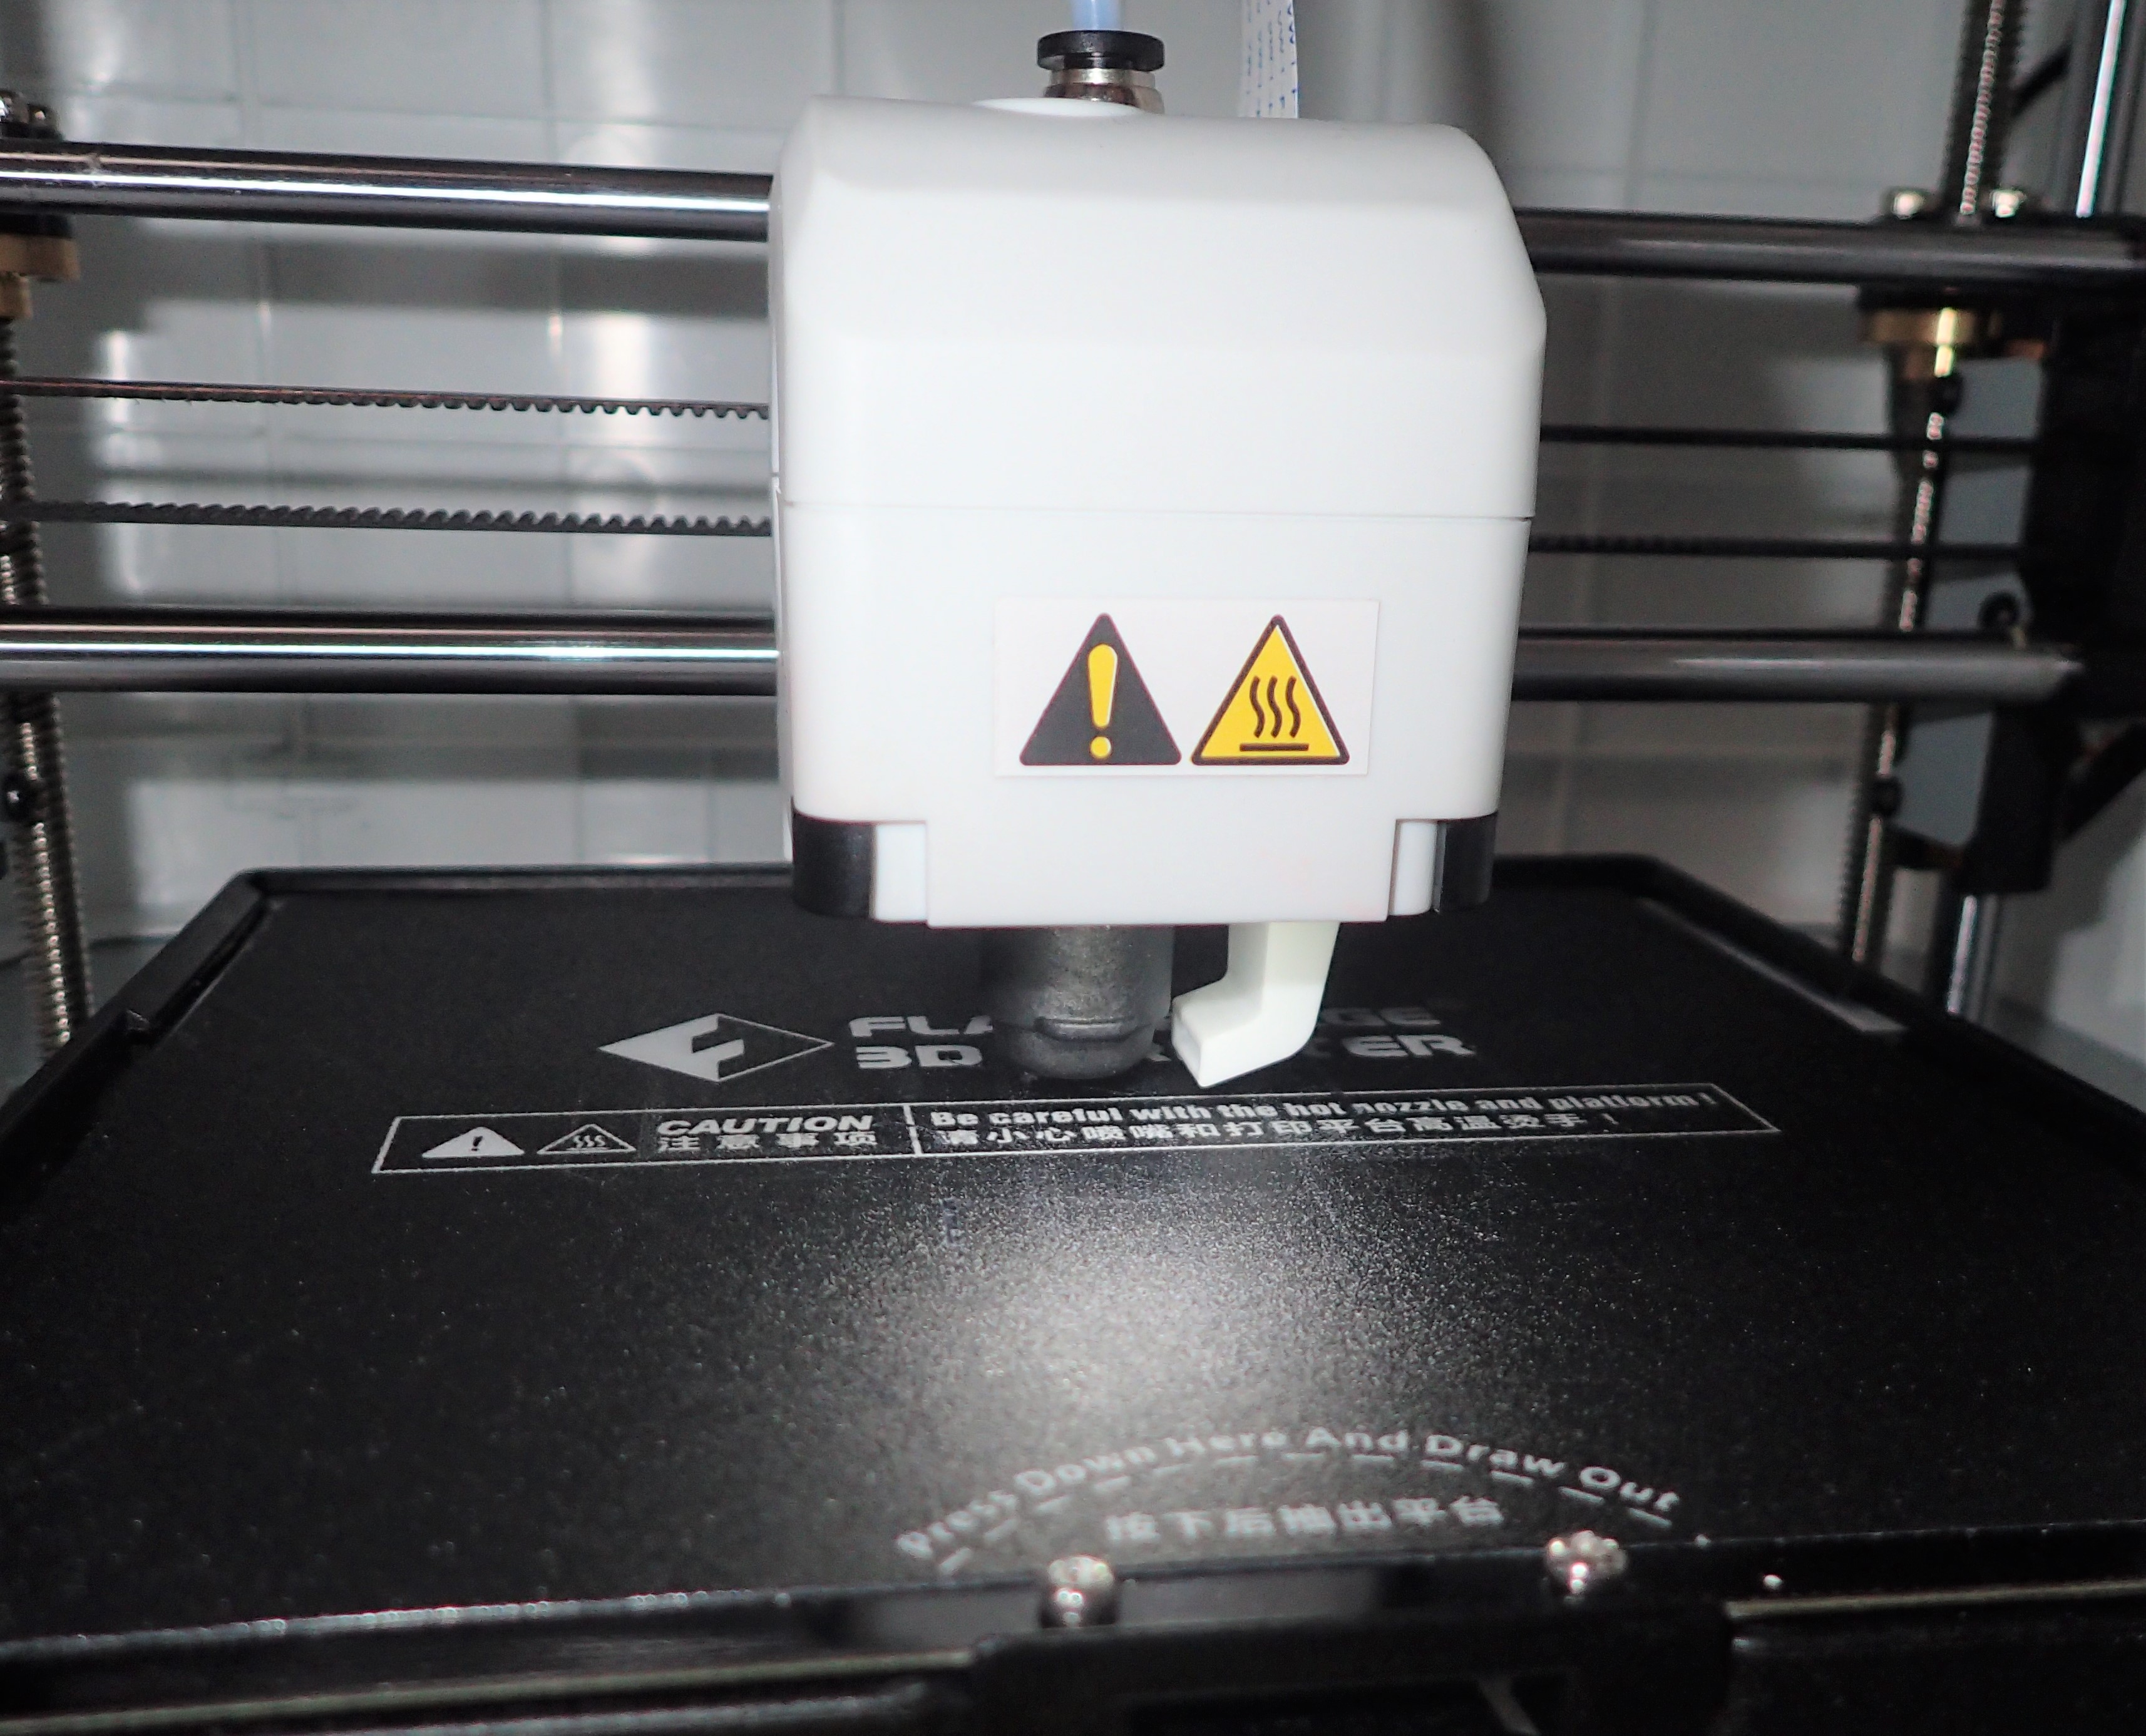
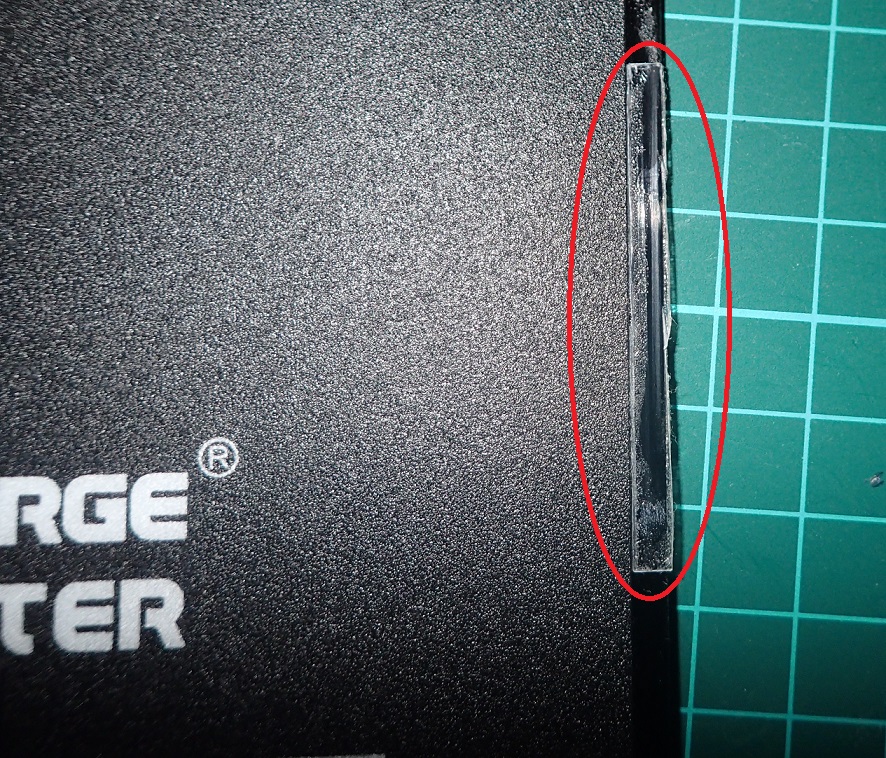
After purchasing the Adventurer 3, I was able to somehow output with the bundled filament, but with a filament other than FLASHFORGE, the first layer was peeled off without a raft, so I could not output well.
After various investigations, it turned out that the output can not be performed well unless the bed is called horizontal to the nozzle.
So I checked my stuff and found that the distance between the four corners and the center of the nozzle was different, so I decided to use a leveler.
FLASHFORGE recommended method
As the user guide does not describe the horizontal line, first I asked for the support of FLASHFORGE and the following answers were received.
-
Open the top plate and adjust the screw rod of Z axis by turning.
-
Apply vinyl tape or the like to the four corners of the build plate and make a gap between it and the nails to make fine adjustments.
I worked according to this, but as a result I could not get enough leveling.
Non-recommended method
I was looking for something other than the FLASHFORGE recommendation, and it was tweet.
左から右にかけてプレートが傾いているようなので、右側(車輪の下)をマスキングテープで底上げして水平にする作戦。±0.5mmくらいの傾きなので10枚くらい貼れば直るかな……。フィラメントはさておき、ビルドシートにはもったないけど死んでもらおう……。#FLASHFORGE #ADVENTURER3 pic.twitter.com/TB83pBM8aJ
— ゆーた@妄想LAB(仮) (@Yuta_Chief) 2018年8月12日
How to level out
Based on the above, I thought it would be best to recommend the following.
Balance adjustment of bed left and right
Adjustment with screw rod of Z axis
Adjust with reference to “Adventurer 3 bed leveling fixture” on the support page of FLASHFORGE and “Video link of adjustment method” below it.
In this adjustment, I think it should be able to catch up with the right side of the bed 0.2 mm below.
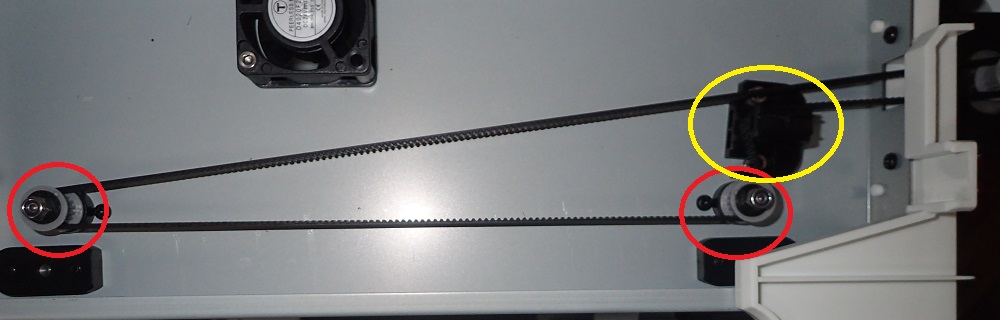
Remove the yellow part and adjust the balance on the left and right by turning the red screw.
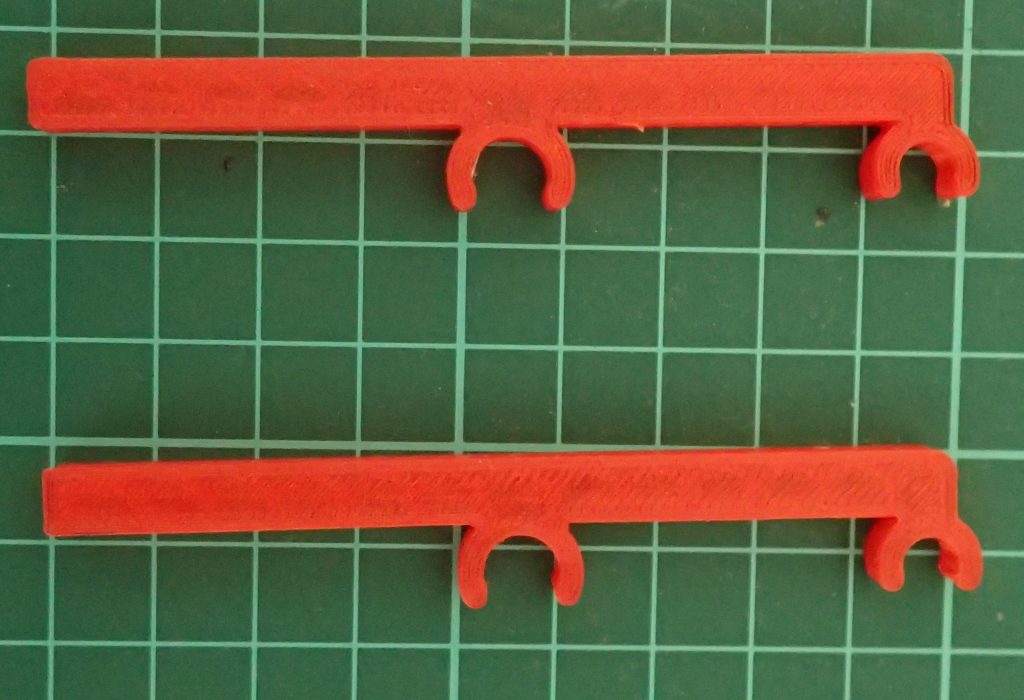
The jig used at this time is like the one in the above figure, but since it is printed out, there is an error of 0.2 mm at the maximum.
What you put on the right side, if possible, will be easier to adjust later.
Put a tape under the bed
In the adjustment with the screw rod, since the right and left are not at the same height completely, tape for raising the bed is placed under the roller for moving the bed to compensate for it.
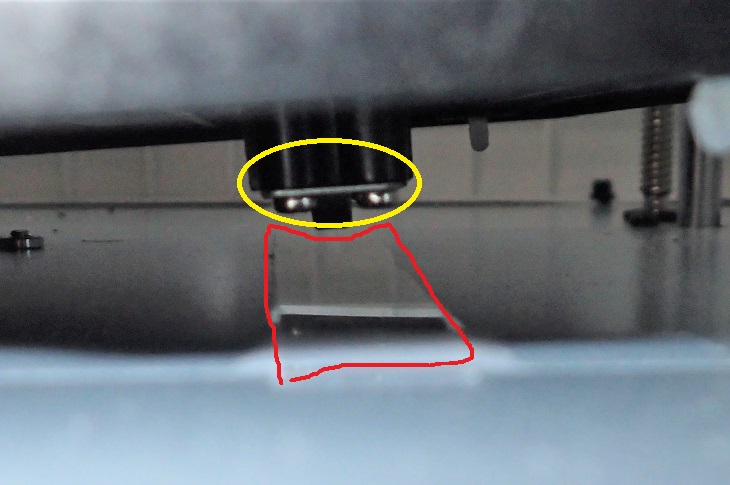
The red one is the tape, and I used to cut the plastic plate I bought at the die saw because the bed was about 0.3 mm down. By the way, the yellow circle is the roller under the bed.
Fine adjustment, put a tape on the bed
Finally, fine adjustment before and after the bed.
The upper right corner of my bed was about 0.3 mm higher, so I put the tape on the bed and caught up with the nails to make final adjustments.
How to check the level
I used FlashPrint’s printer operation to check the distance between the bed and the nozzle.
- Proofreading
In order to set the correct nozzle position, first perform calibration from the screen of Advertiser 3. Thus, the zero position of the nozzle is determined first. - Bring Z axis to 0.0 with printer operation
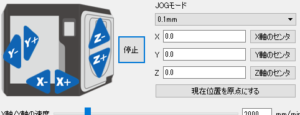
In the operation screen JOG mode, bring X and Y near the center. At this time, I think that “continuous manual operation” is good in JOG mode. When near the center, set the JOG mode to 0.1 mm, press Z + and bring the Z axis to a height of 0.1 mm. By the way, if you press Z-, the height will be -0.1 mm, so the nozzle will push the bed. - The JOG mode is set to “continuous manual operation” again, the position of the nozzle is moved vertically and horizontally relative to the bed, the gap between the bed and the nozzle at that time is measured, and the level of the bed and the nozzle is measured.
It may be better to have a taper gauge to measure the gap.
Since I had no hand, I manually brought the Z-axis height to 0.0 and measured the gap by stacking paper.
Problems with Z-axis screw rod adjustment
At first, I thought that this solution would solve the problem, but when I tried it, there were various problems.
First, the accuracy of the jig used for leveling. The jigs are distributed by STL and output by their 3D printer, but the accuracy of the printer itself is ± 0.2 mm, and when the actual output is measured with a caliper, the difference of around 0.2 mm is still there were. If this is used, it will be reflected also on the level of the bed.
Next is the problem when fixing the screw. After adjusting the screw, when attaching the parts for fixing the belt, the belt and screw turn slightly, and there is still a slight difference between the left and right. If there are four hands, maybe it can be fixed.
コメント