I tried to create something that can be controlled with a GUI, but when I started using Windows Presentation Foundation (WPF) to create a GUI, the items I needed to study related to it all increased rapidly. Completion has gone away.
I changed the policy a little, and at first I decided to make the person who outputs the data output from the slicer software to his / her favorite content and output it to the device first.
The function I created was added to the console-based one I created earlier.
File correction function summary
For the G code file output from Simplify3D, add header / footer that can be output on the device side, global offset in Simplify3D (Z-axis only), add a command to remove play when moving the Z-axis, correct Blim output Can be done by specifying a parameter file.
Add header and footer
So far, the contents that were output by the script after start script and finish of Simplify 3D are done in this program.
Here, it is possible to turn on / off the chassis fan control and set the voltage of the stepping motor, which were in FlashPrint.
In addition, for the movement speed of the nozzle to the bed surface and the movement of the nozzle to the retracted position after output, the parameters on the Simplify 3D side are followed.
Global offset (Z axis only)
Added Simplify3D’s global offset on this side.
Because we wanted to fine-tune the amount of global offset according to the situation of calibration, we decided to do it here.
Removal of play when moving Z axis
As the movement of the Z-axis moves from bottom to top, add a G code that raises the Z-axis slightly back. At this time, the movement immediately follows the parameters on the Simplify 3D side.
In the future, since we want to correspond to G code files on FlashPrint side, this program has made it possible.
Brim output correction
It was possible to adjust the speed at the time of brim and skirt output and the injection amount.
The speed and injection amount of Brim (pre-injection) were better set on the FlashPrint side, so I was able to approximate it.
How to Use
The contents of the file output by Simplify3D need to be adapted to the program. That is the following precondition. For this, prepare a parameter file that uses the above-mentioned function, and output it by j command of the program.
Prerequisites (setting Simplify3D)
Tool-Firmware Configuration
Import and use parameter / FlashForge Adventurer3.frm in the download file. The differences from the base Dreamer are as follows:
- FFF Tab-Stabilize Extruder Temp
M104 S0 T1 - FFF Tab-Set Bed Temperature
M140 S$ T# - FFF Tab-Stabilize Bed Temperature
Blank
FFF Settings
From the starting script on the Scripts tab, leave all of the script blank.
The only additional terminal commands for post processing are:
{EXTENSION “g”}
Parameter file
Prepare the following file with the extension json.
The parameters of the sample are in “parameter / sample.json” in the download file.
{
"enclosureFanOn":false,
"motorA":100,
"motorB":20,
"motorX":100,
"motorY":100,
"motorZ":40,
"playRemovalLength":0.5,
"offsetZ":-0.04,
"brimSpeedType":1,
"brimSpeed":600,
"brimSpeedRatio":100,
"brimExtrudeRatio":150
}
The contents of the parameters are as follows.
- enclosureFanOn
Specify the operation of the chassis fan. true on, false off - motorA~motorZ
The stepping motor voltage on the FlashPrint side.
I do not think that I will change it. - playRemovalLength
Z-axis movement amount of play removal command.
Set a value of 0.0 or more. - offsetZ
Amount of global offsets.
Below 0, the nozzle is offset in the direction in which it was moved. - brimSpeedType
Select the correction method of moving speed of brim.
Do not correct (0), specify with absolute value (1), specify with relative value (2) - brimSpeed
Absolute value of moving speed of brim (mm / min) - brimSpeedRatio
Relative value of moving speed of brim (%).
Assuming that 150, output at 1.5 times the speed. - brimExtrudeRatio
Amount of filament injection of brim (%).
If it is set to 300, it will be 3 times the injection quantity of usual.
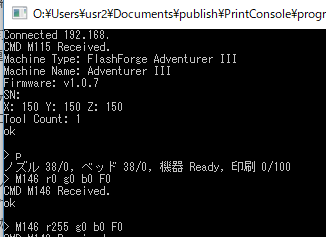
output method
When “>” is displayed on the console screen, enter the following.
jG “code file name” “parameter file name”
For example, as follows.
jtest1.g test1.json
This starts file transfer to the device.
Finally
Once, only the output environment was ready, so I want to output more and more from now on. Also, I would like to further improve the operability of the program.
コメント