A summary of how to manage your own library for use with PlatformIO, how to apply it to your project, and how to operate it.
At first.
PlatformIO creates a library and publishes it (pio package publish) so that it is registered in the PlatformIO Registry and can be referenced in the PlatformIO Libraries-Registry.
This is convenient, but I’ve summarized a little about what to do with things that you don’t want to publish.
Creating a library
It’s a good idea to create a dedicated folder / project to make it easier to cite in later projects.
Creation is no problem with PlatformIO’s New Project.
After creating the project, add the following line to Platformio.ini.
lib_extra_dirs=libThis will allow you to see the libraries under development in PlatformIO’s Libraries-Installed.

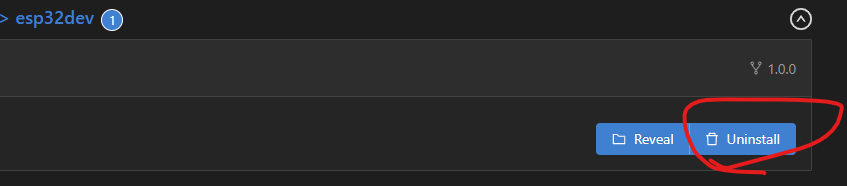
It is important to note here that you should not press Uninstall at the bottom right before managing the library project with the source control function.
The folder displayed here will be deleted.
After completing the above work, create a folder under lib and build the library there.
For the folder structure, refer to the README under the library folder, and the library construction itself should conform to https://docs.platformio.org/en/latest/librarymanager/creating.html.
There is a difference between the folder structure on the homepage side and the folder structure on the README side, but I think the README side is easier to manage.
After creating the library, the main source created for testing should be moved to the expamles folder and used as a sample program.
The structure of the actual library looks like the following.

Also, manage and describe the version number properly in library.json.
You will need this information where you cite it in your project.
To use on the project side.
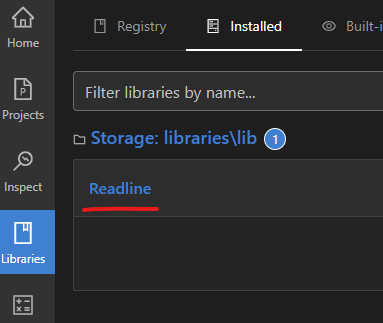
Open Libraries-Installed on PlatformIO Home.
The libraries in the library project will be displayed. Open the required library and open the Installation tab.
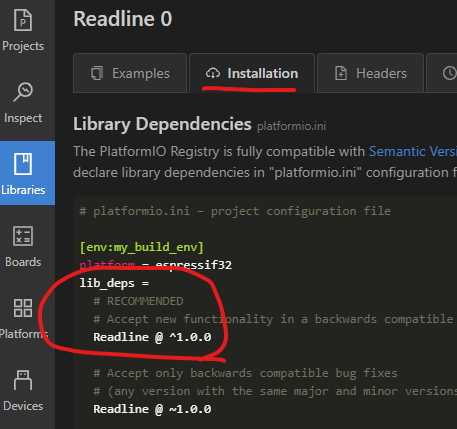
Add to platformio.ini of the current project referring to the description of “lib_deps = ~” described in this.
Just note that it will be the path where the library is located.
If there is already a description of lib_deps, insert a line feed code and add it.
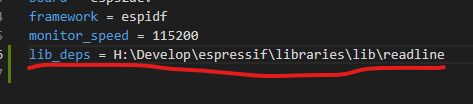
Like this.
This will automatically load the .piolibdeps under the current project on the PlatformIO side.
- Important.
It seems that the “file://” format is also allowed as a description method, but if it is described in Windows, the library management process will fail at build time.
It is possible to specify github with https, but if it is private, this will also result in an error. This is probably because you cannot log in to github with your own login account in the search program.
That’s it.
The library is loaded from the source described after setting or at build time.
After loading, open PlatformIO’s Libraries-Installed and it looks like this.
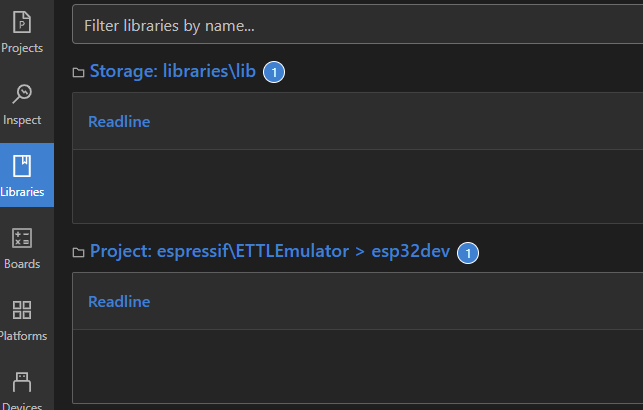
The original “libraries/lib” above is in the project for the library. Below is a copy of the referencing project.
What to do when updating the library.
The library sources loaded in the project are basically the same until you uninstall with Libraries-Installed.
Even if the source on the library side is updated, it will not be reflected on the project side as it is.
Those registered in the Registry seem to be able to check the update status with Libraries-Updates, but other libraries seemed to be out of scope.
Therefore, when updating the library, it is necessary to perform the update process manually.
By uninstalling the library in the project and then building, the latest version is obtained from the source listed in lib_deps and the build can be started.
It is up to you to decide which library to update, but as a guide, the version information described in library.json.
If there is a higher version, it seems better to delete the one in the project and update it.
コメント