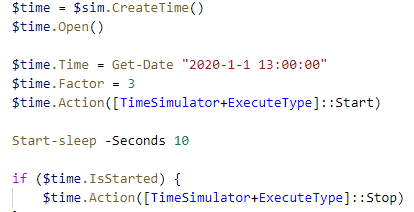
The first half is the same as the code at the beginning here.
Only the subsequent simulator operation part is described here.
$time = $sim.CreateTime()
$time.Open()

$time.Time = Get-Date "2020-1-1 13:00:00"
$time.Factor = 3
$time.Action([TimeSimulator+ExecuteType]::Start)

Start-sleep -Seconds 10

if ($time.IsStarted) {
	$time.Action([TimeSimulator+ExecuteType]::Stop)
}

# Sample code for capture
$time.Action([TimeSimulator+ExecuteType]::Start)
Start-sleep -Milliseconds 500
$time.Action([TimeSimulator+ExecuteType]::Pause)

$bitmap = $sim.Capture()
$bitmap.Save("ファイル名")
$time.Action([TimeSimulator+ExecuteType]::Stop)

if ($time.IsOpen) {
	$time.Close()
}
Operation class for the “Time Simulation” window, which you will often use when testing watch faces.
- Lines 1 and 2: Creating an operating object and opening the Time Simulation window
- Lines 4 and 5: Simulation start time and speed factor setting
Start time is set by generating DateTime type with Get-Date.
In the Action function, perform the same action as pressing a button in the window. - Line 24: The “Time Simulation” window is closed.
You don’t have to look it up in IsOpen, but IsOpen is listed as a sample.
In addition, when Stop is not performed by Action, the process equivalent to Stop is also executed by the Close function. - Lines 14-21: If you want to capture the watch face at the specified time, implement it as shown here.
After Start, pause for a time when the screen will be refreshed.
Capture after pause. Then Stop to return to the current time state.
Basically, if you set an operation that changes the screen contents before this code, such as language, battery information, etc., you can capture the screen at a specific time.
If you use this, you will be able to check the degradation when changing the code without much hassle.

コメント